Wiring & Installation of Generator Plugs for Safe Home Power: Your Essential Guide
A sudden power outage can quickly turn modern convenience into frustrating chaos. While a portable generator offers a lifeline, safely connecting it to your home's electrical system is far from a simple plug-and-play task. Incorrect wiring and installation of generator plugs pose serious risks – from electrocution and property damage to endangering utility workers. This guide cuts through the noise, offering clear, actionable steps for safe generator plug wiring, grounded in electrical best practices and crucial safety protocols.
Whether you're prepping for the next storm or optimizing your existing setup, understanding how to properly wire and install generator plugs is paramount. It’s about more than just getting power; it’s about doing it right, minimizing risk, and protecting your family and community.
At a Glance: Key Takeaways for Generator Plug Safety
- Transfer Switches are King: The safest, NEC-compliant method for connecting a generator to your home is via a professionally installed transfer switch.
- Backfeeding is Deadly: Never connect a generator directly to your home without isolating it from the utility grid. Backfeeding electricity risks electrocution for utility workers.
- Male-to-Male Cords are Prohibited: These "suicide cords" are extremely dangerous and can cause severe injury or death. Avoid them at all costs.
- Grounding is Non-Negotiable: Ensure your generator's frame is properly grounded to prevent electrical shock.
- Know Your Plugs: Most portable generators use a 4-prong NEMA L14-30 twist-lock outlet. Understand how to wire these safely.
- Emergency vs. Permanent: Emergency, non-code-compliant methods (like dryer line connections) should only be used in extreme situations, at your own risk, and with stringent safety measures.
- Always Disconnect Main Power: Before any wiring or connecting, always turn off your main electrical disconnect.
- Professional Help: For permanent solutions or if you're unsure, consult a licensed electrician.
The Looming Dangers of Imprudent Generator Connections
Connecting a generator isn't like plugging in a lamp. The stakes are incredibly high. Without proper installation and strict adherence to safety protocols, you risk more than just a tripped breaker.
The Big Three Hazards You Must Avoid:
- Backfeeding the Grid: This is arguably the most dangerous scenario. If your generator is connected to your home's electrical system without isolating it from the utility grid (i.e., without a transfer switch), your generator's power can flow backward into the utility lines. This creates an invisible, lethal hazard for utility linemen working to restore power. It can also damage your generator and other home appliances.
- "Suicide Cords" (Male-to-Male Extension Cords): These homemade cords, with a male plug at both ends, are an extreme electrocution risk. One end plugs into the generator, and the other into a house outlet. If the generator is running and the male end becomes disconnected from the house, the exposed prongs are live with lethal voltage. They are illegal and exceptionally dangerous.
- Miswiring and Human Error: Incorrectly wiring a generator plug or relying on manual main breaker operation instead of an automatic transfer switch significantly increases the chance of hazardous conditions or accidental backfeeding. Even the smallest wiring mistake can have catastrophic consequences.
Important Safety Rules – Etched in Stone:
- ALWAYS turn OFF the main electrical disconnect to your home before starting any work on generator connections. Keep it off until the generator is unplugged and completely shut down.
- Wear lineman rubber gloves when handling electrical components, especially in the main panel.
- Operate your generator outdoors only, far from windows, doors, and vents to prevent deadly carbon monoxide poisoning. Ensure exhaust is directed away from living spaces.
- Understand that methods not using a transfer switch are NOT fully safe, do NOT comply with National Electrical Code (NEC®), and should only be used in extreme emergencies at your own risk. For individual appliances, use approved outdoor extension cords.
Understanding Your Generator's Output: NEMA Plugs Explained
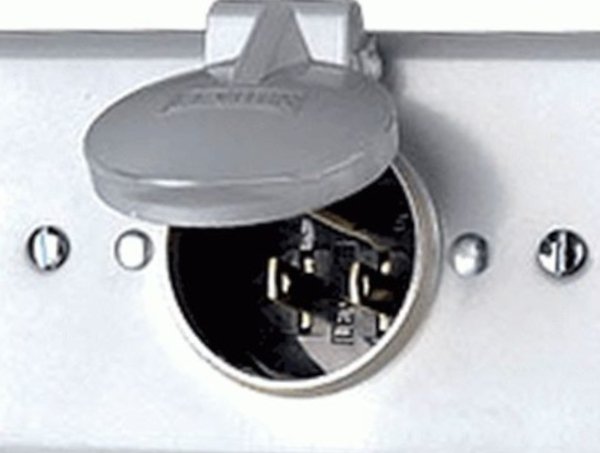
Most portable generators rated 5000 watts or higher come equipped with a specific type of outlet: the 4-prong 125/250V twist-lock outlet, NEMA L14-30. This workhorse provides two "hot" wires (L1 and L2), a neutral, and a ground. This configuration allows your generator to supply both 120V (between L1 or L2 and neutral) and 240V (between L1 and L2) power, suitable for a wide range of household needs.
Wiring a 4-Prong NEMA L14-30 Generator Plug:
When you're creating a custom generator cord or replacing a plug, proper wiring is crucial. Here's the standard color code you'll follow:
- Green Wire: Connects to the ground terminal (often marked "G" or with a ground symbol).
- White Wire: Connects to the neutral terminal (often marked "W" or "N").
- Black Wire (L1): Connects to one of the hot terminals (often marked "X" or "L1").
- Red Wire (L2): Connects to the other hot terminal (often marked "Y" or "L2").
Ensure each wire is securely fastened within its terminal and that sufficient insulation covers the connection points, leaving no bare wire exposed outside the terminal.
Quick Clarification: Generators rated at 4000 watts or less typically provide only 120V power. This means they can only energize half of your home's electrical branches. If you have a 120V generator, you might need to strategically move key branches in your electrical panel to the single bus it can power, or manage loads carefully. It cannot power 240V appliances.
The Gold Standard: A Permanent Transfer Switch
Before diving into emergency connections, it's vital to reiterate the safest and most reliable method: a transfer switch. This device is permanently installed in your home's electrical system by a licensed electrician. It allows you to safely switch your home's power source from the utility grid to your generator, completely isolating your house from the grid and preventing backfeeding. While this guide focuses on plugs, understanding understanding transfer switches is fundamental to safe generator use.
When installing a transfer switch isn't immediately feasible, temporary, emergency methods using existing household outlets (like a dryer outlet) might be considered. However, these methods come with significant risks and strict protocols.
Emergency Connections: Proceed with Extreme Caution
In dire emergencies where a transfer switch isn't available, and you've exhausted all other options (like dedicated extension cords for individual appliances), you might consider connecting your generator through an existing 240V household outlet. This is a risky, non-code-compliant maneuver that should be performed only with the utmost care and understanding of the dangers.
Scenario 1: Connecting a 4-Prong Generator to a 3-Prong House Outlet (NEMA 10-30R)
Older homes (typically pre-1996) might have a 3-hole 120/240V NEMA 10-30R outlet, commonly used for electric dryers. The critical distinction here is that these outlets provide two "hot" wires and a neutral, but no separate ground wire. Instead, old appliances using these outlets had an internal jumper connecting the neutral terminal to the appliance's metal frame (grounding lug).
Crucial Warning: There are no safe 3-prong to 4-prong adapters on the market. You must create your own cable to adapt your generator's 4-prong output to a 3-prong home outlet. This immediately flags it as a non-standard, emergency-only solution.
Creating Your Custom Emergency Cable:
- Obtain appropriate heavy-gauge, flexible 4-conductor cable (e.g., 10/4 AWG for 30A).
- Install a NEMA L14-30P male plug on the generator end of the cable.
- On the house end, install a NEMA 10-30P male plug. This plug will have three terminals: two hot, one neutral.
- Wire the NEMA 10-30P plug: Connect the black (L1) wire to one hot terminal, the red (L2) wire to the other hot terminal, and the white (neutral) wire to the neutral terminal.
- What about the green (ground) wire? This is where it gets tricky and requires additional steps for grounding.
The All-Important Grounding Strategy (NEMA 10-30R specific):
Since the NEMA 10-30R outlet lacks a dedicated ground, you need to ensure proper grounding for your generator.
- Generator with Built-in GFCI: If your generator has a built-in GFCI (Ground Fault Circuit Interrupter), its frame should be internally bonded to the neutral. You can verify this with an ohmmeter (check for continuity between the neutral terminal and the generator frame). In this case, the generator's internal grounding may suffice, but always double-check.
- No Built-in GFCI (or unsure): You must ground the generator frame independently. Drive a copper or brass rod at least 2 feet deep into the earth, close to the generator. Connect the generator frame to this rod using a #6 AWG wire, following NEC® 2020 Article 250 requirements for a grounding electrode system.
- Emergency In-House Grounding (Last Resort): In an extreme emergency, with the generator cable plugged into both ends, you can attach the green ground lead from your generator cord to the wall outlet's metal cover plate. Crimp a round lug onto the green wire and place it under one of the mounting screws of the cover plate. This provides a path to ground only when the cord is fully connected, and relies on the house wiring's ground path, which may or may not be robust for a 3-prong outlet.
- Verify Continuity: Before starting the generator, always use an ohmmeter to confirm continuity between the generator frame and the earth (via the grounding rod or, if using the wall plate method, between the frame and a known good house ground).
Power Limitations:
The maximum power you can draw is limited by the lesser of your generator's 120/240V circuit breaker and the house's dryer line breaker. For example, a 30A generator connected to a dryer line protected by a 20A double-pole breaker means you can only draw a maximum of 20A at 240V (4800 volt-amps). For safety, it's recommended to load breakers only up to 80% of their rating (e.g., 16A for a 20A breaker).
Scenario 2: Connecting a 4-Prong Generator to a 4-Prong House Outlet (NEMA 14-30R)
Newer homes often feature 4-prong 125/250V dryer outlets, NEMA 14-30R. This type is preferable because it includes a separate ground hole in addition to the two hot leads (L1, L2) and neutral. This makes the connection simpler and safer as you don't need the specialized grounding work required for 3-prong outlets.
To connect your generator, you'll need a specific generator cord with a NEMA L14-30P male plug on the generator end and a NEMA 14-30P male plug on the house end. You'll wire it according to the standard color codes: green to ground, white to neutral, black (L1) and red (L2) to their respective hot terminals. Always ensure the plug you're using matches the NEMA 14-30R receptacle.
For more general generator safety tips, remember to prioritize proper ventilation and maintenance.
Beyond the Plug: Direct Wiring Approaches (For Licensed Professionals Only)
The following methods bypass standard plugs and involve direct wiring into your home's electrical system. These are advanced procedures that carry extreme risks and should ONLY be performed by a licensed electrician. Attempting these yourself without proper training, tools, and understanding of the NEC is incredibly dangerous and highly illegal in many jurisdictions.
Direct Wiring at the Dryer Receptacle:
If you choose this method (or have a professional do it), the house main circuit breaker MUST be OFF. Remove the dryer receptacle from the wall and disconnect all its wires. Attach these wires to your generator cable leads one by one using standard wire nuts: hot (black/red) to hot, neutral (white) to neutral, and bolt the green ground lead to the metal wall box. Secure the generator cable to prevent it from hanging by its leads, which could cause stress on the connections.
Direct Wiring at the Main Electrical Panel:
This is the most intrusive and hazardous direct connection method.
- Cut ALL Power: Flip the main circuit breaker to the OFF position. This is non-negotiable.
- Protective Gear: Wear lineman rubber gloves. The panel's incoming utility lines may still be energized even with the main breaker off.
- Access: Carefully remove the main panel's cover door.
- Wiring: Use a sufficiently long 4-wire generator cord.
- Bolt the red and black leads (hot) to the "hot" busbars (the thick vertical metal plates) downstream from the main double-pole breaker. Crucially, do NOT connect to the lines going directly to the electric meter. This is where the main breaker isolates the house from the grid.
- Bond the white (neutral) lead to the neutral bar.
- Bond the green (ground) lead to the metal case of the panel.
- Warning Signage: Place a highly visible sign on the panel advising "Do not touch anything until the generator is OFF and disconnected."
- Load Management: Before starting the generator, ensure all individual branch circuit breakers in the panel are turned OFF to prevent immediate overload.
- Power Up: Start the generator, let it warm up, then activate needed branch lines one at a time.
This method completely bypasses safety devices and relies entirely on manual operation. It underscores the importance of consulting local electrical codes before attempting any significant wiring.
The Critical Sequences: Powering On and Off Safely
Whether you're using a dryer outlet or a more advanced connection, following a precise power-up and power-off sequence is non-negotiable for safety.
Power-Up Sequence: Every Step Counts
- Isolate Your Home: Turn OFF the main electrical service disconnect to your entire house. Attach a visible "DO NOT TURN ON" note to it. This is your primary defense against backfeeding.
- Clear the Loads: Turn OFF all individual branch circuit breakers in your distribution panel, including the double-pole breaker that feeds the outlet you plan to use (e.g., your dryer outlet).
- Connect to House First: Plug your modified generator cord into the house outlet (e.g., NEMA 10-30R or 14-30R) first. Place a "DO NOT UNPLUG UNTIL GENERATOR IS OFF" note on the cord.
- Route the Cord: Run the generator cord through an open door or window to outside, ensuring it won't be pinched or damaged.
- Connect to Generator: Now, connect the cord to your generator's L14-30 outlet.
- Ensure Generator Grounding: Double-check that your generator frame is properly grounded (either internally, via a grounding rod, or, in emergency cases, via the house's wall plate connection).
- Start Generator: Start the generator and allow it to run for 5 minutes to stabilize.
- Energize Main Generator Circuit: Turn ON the double-pole breaker in your house's electrical panel that feeds the 120/240V generator outlet you're using.
- Power Up Loads Gradually: Begin turning on individual branch circuit breakers in your electrical panel, one at a time, to energize critical branches. Monitor your generator's load and avoid overloading.
Power-Off Sequence: Safety in Reverse
- Reduce Loads: Turn OFF all individual branch circuit breakers in your electrical panel.
- De-energize Generator Circuit: Turn OFF the double-pole breaker that feeds the generator outlet.
- Disconnect Generator First: Unplug the extension cord from the generator first, then from the house outlet. NEVER unplug the load side of the cable (the house end) first while it's still energized by the generator.
- Shut Down Generator: Turn off the generator and allow it to cool. This is also a good time to maintain your portable generator for future use.
- Restore Utility Power: Once utility power is fully restored (and you've confirmed it), turn ON the main service breaker to your house.
- Remove Warnings: Remove all "DO NOT" notes.
Tools for the Job & Essential Checks
Having the right tools and knowing how to use them is key to confident, albeit cautious, generator plug wiring.
Must-Have Tools:
- Screwdriver Set: Flathead and Phillips for terminal screws.
- Wire Strippers: For safely removing wire insulation.
- Multimeter (Voltmeter/Ohmmeter): Absolutely essential for verifying voltage, continuity, and checking for shorts.
- Lineman Rubber Gloves: For electrical work.
- Heavy-Gauge Generator Cord: Appropriate length and gauge (e.g., 10/4 AWG for 30A).
- Replacement Plugs: NEMA L14-30P, NEMA 10-30P, or NEMA 14-30P as needed.
Critical Wiring Checks:
- Visual Inspection: Before starting, ensure the generator is off and cool. Inspect all plugs and cords for any damage, cracks, or frayed wires.
- Correct Wiring: Re-verify your connections: Green to Ground, White to Neutral, Black (L1) and Red (L2) to Hot terminals.
- Secure Connections: Tighten all terminal screws firmly without overtightening, which can strip screws or damage wires. Give each wire a gentle tug to ensure it's secure.
- Insulation: Make sure no bare wire strands are exposed outside of the terminal clamps. All connections should be fully insulated within the plug body.
- No Shorts: Visually check that no wires are touching each other where they shouldn't.
Essential Testing with a Multimeter:
- After Wiring: After securing all connections and before connecting to the house, power on the generator (outdoors, away from structures). Let it stabilize.
- Verify Voltage Output: Use your multimeter to check the AC voltage output at the generator's receptacle. For an L14-30, you should read approximately 120V between each hot terminal (L1, L2) and neutral, and approximately 240V between L1 and L2.
- Continuity Check: With the generator OFF, use the ohmmeter function to check for continuity between the generator frame and your grounding rod (if applicable).
- Check for Shorts: Ensure there are no unintended shorts between any hot, neutral, or ground terminals.
Troubleshooting Common Wiring Issues
Even with careful attention, issues can arise. Here are some common problems and their solutions:
- No Power Output / Breaker Tripping:
- Incorrect Wiring: The most frequent culprit. Double-check your wiring diagram against the plug and generator's requirements. Use your multimeter to verify connections. A reversed neutral and ground, or a hot wire connected to neutral, will cause problems.
- Loose Connections: Vibrations from the generator or improper initial tightening can loosen connections. Turn off the generator, unplug the cord, and re-tighten all terminal screws.
- Overload: You might be trying to draw too much power. Turn off some appliances or branch circuits. Remember the 80% rule.
- Damaged Wires: Frayed or cut wires can cause shorts or breaks in the circuit. Replace any damaged wires with the correct gauge and type.
- Intermittent Power: Often points to loose connections or a partially damaged wire within the cord or plug. Inspect thoroughly.
For deeper insights into generator power options, you can explore our generator plug guide.
Final Words of Caution and Professional Advice
The information provided here is for technical reference only. It represents the author's opinion and does not constitute professional or legal advice. Using this information is at your own risk.
Connecting a generator to your home's electrical system, especially without a transfer switch, is fraught with danger. We cannot stress enough the importance of always referring to the National Electrical Code (NEC®), your local electrical codes, and your product manuals.
It is strongly advised to consult a licensed professional for any generator wiring or installation work. An experienced electrician can assess your specific needs, ensure code compliance, and install a safe, reliable transfer switch that protects your family, your property, and utility workers. Don't take chances with electricity – the consequences can be fatal.
To learn more about various emergency power solutions, beyond just wiring plugs, consider your home's specific needs and local regulations.